

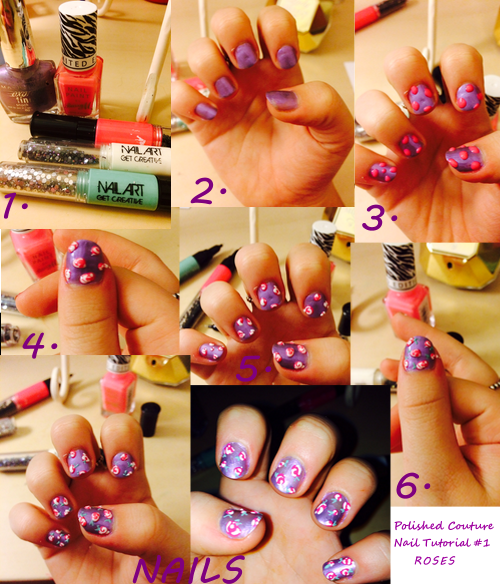
So last night i posted on Twitter my new nails id painted. I decided to post a tutorial on here so you guys can get the look too! There so easy and cute but do take a while to do.
First you need:
1 nail polish; depending on the color of the flower i would go for a blue or purple. (purple nail varnish by Rimmel)
3 nail pens; these can be found in many high street shops but i got mine from Primark for just £1 each
- 1 white
- 1 pink
- 1 green
First paint all your nails the chosen color, no more than two coats as the nail pens take ages to dry! Then once the nails are try add small circles to your nails put 4 to 5 circles on each nails with enough space for the leaves. Once the nails are dry use the white pen to draw circly curls inside the circles. this gives the effect of a rose, the different layers. to do this to each nail. Finally, usuing the green pen draw two little lines on each rose to give the look of leaves and taah dahh! perfect flower nails.
Closer look:
Related articles
- Popular Nail Polish for the Season (jayrod28.wordpress.com)
- Nail Art How-To: Chic Champagne Nails (Forevervogue.com)
- Festive Nail Art: Our Pick of the Best Festive Nail Polishes (birthdaymagazine.co.uk)
- Nails, nails, nails… (shazoeblog.wordpress.com)


[…] Nail Tutorial #1 (polishedcouture.wordpress.com) […]
Love your nail art! So pretty. 🙂
lovefromtwinkle.blogspot.co.uk
[…] Check out my previous post on a catch up of how to do it here. […]